Showing posts with label Tania being crafty. Show all posts

Wednesday, April 11, 2012

Another MAP BAG

The hubster had asked for a bigger document bag this morning to carry his stacks of papers...and so I went to work on my sewing machine with a map that I had rescued from the trash and lots of vinyl.

This was an easy one to sew...I decided to sew on the wrong side instead and so I had to flip the bag to the right side and that was what was really hard to do.

My paper map got a little crumpled in the process but no biggie as the vinyl layers have kept the map in one piece with no tears or whatsoever. So here it is....my waterproof (crumpled) MAP BAG for my dearest.
The map is printed on both sides so it's mappy on the inside of the bag too...NICE!
And there's a map of Boston and vicinity....good for when we get lost!

Tuesday, March 20, 2012

No knit knit bag (upcycling)

I saw some knitted bags on etsy....they are soooooooo pretty but costly....and unfortunately, after a 2-decade hiatus, I've totally forgotten how to knit :P

So I thought....hey, I can sew right?! How about if I make use of old knit sweaters and convert them into purses?

I found a natural color cable sweater at Salvation Army for $3 and I set about to create my first ever no-knit knit bag.

The original bag design was a little more ambitious....but once I started cutting up the sweater...I was horrified to see the knit fabric "disintegrating" right in front of my eyes.

Having had no prior experience sewing knit fabrics...I soon realised that I had bitten off more than I could chew.

Anyway, to keep long story short...I learned that I need to stablise the knit fabric first before I cut. I did that by using a zigzag stitch to sew along the entire length of where I wished to cut. And I also had to prevent fraying of the knit fabric by running the zigzag stitch again around all the edges. And 'cos of the "technical difficulties" involved, I decided to keep the bag design simple...at least for my virgin attempt.

Well...TA-DA!

The fabric flower was made out of an old sheer curtain.
I have to admit that I'm a little intimidated by knit fabrics now after my virgin experience....but I have promised myself to attempt a couple more such no-knit knit bags and not admit defeat so soon....especially when I still have another 3 knitted sweaters from Salvation Army for this purpose....yikes! :P

Monday, December 12, 2011

Xmas decorations on a budget

So what's a gal got to do when she's on a tight budget for her xmas decorations? (A) She uses what she already has; (B) She buys cheap stuffs; (C) She gets her hands dirty or (D) All of the above.

So using what we already have.....a big beautiful Holly tree in the yard!

With a pair of pruning shears and a pair of thick gloves....I went about to trim off some twigs from the Holly tree.

And at Michaels yesterday, I had bought a wreath for less than $2 and a big red bow for $0.99. The cost of Holly leaves/berries - $0.00. 

Ta-da! My $2.99 x'mas wreath....not too shabby huh? Well, sometimes, simple is best....especially when budget is tight :P
And the remaining holly leaves/berries, I just bundled up the twigs and tied a ribbon around them for hanging as wall decorations around the house. That is......errrrmmm FREE!

Lil red mushroom on my finger....

Can't believe it took me so long to finally buy a tube of glue from Michaels to finish off the ring pin cushion that I had made eons ago! Lil red mushroom and adjustable ring got married together by some E-6000 and here's the finished product....

Tried it on....perfect fit of course (the ring is adjustable silly!).

My sewing box is getting wayyyyy out of hand.....I have been having great difficulties rummaging through all the STUFFS to find what I need....some organisation is obviously needed here.....

....and the solution, a hanging jewelry organizer from TJMaxx. Now everything is sorted neatly and in plain sight...what a JOY!

Sunday, December 11, 2011

Temperatures are dipping.....

The past weeks had been pretty warm, which was quite unusual. Finally the temperatures are dropping and it's starting to feel more like winter. Good thing however that on the northeastern coast, cold wintry days aren't dreary like in some other parts of the world. Like now, it looks sooooo sunny outside that you wouldn't be able to tell that it's cold unless you step out of the house. And it's the colder months when the sunrises and sunsets are particularly beautiful. Just the other day, I snapped this shot of the red fiery sky minutes before sunrise. It was most amazing! 

RG received his belated birthday present from his family...and it's an iPad2. I'm so jealous :P It even comes engraved with his name and favorite quote. It's the very first i-something in our household so that's a big deal!

Now apples aside....I found these weird looking dark brown tomatoes (called Kumatoes) at the supermarket. I don't really know what to do with them yet....will have to taste it first to see how best to eat them.

Got this big bottle of Earth Friendly hand soap for a great price at Ocean State Job Lot. It's not only gentle on the hands but good for the environment too. It's free of formaldehyde, petrochemicals, GMOs, phosphates, chlorine, ammonia and it's biodegradable and pH neutral. I'll re-bottle the hand soap into one of my foam pump ones to stretch my dollars even further :P 

RG needed a document bag to hold his stacks of paper.....so I made him a simple fabric tote using this beautiful map fabric that I had bought awhile ago on etsy. He loves maps too so I figured it'd be a great fabric for him.

Tuesday, December 6, 2011

Upcycled map of NEW YORK cosmetic pouch

I'm kind of a travel brochures/maps hoarder. Wherever we travel to....we'll pick up tonnes of them. As my stash continues to grow at exponential speed....I was thinking hard if I could use the beautiful brochures/maps for anything else before resorting to dump some of them out with tomorrow's recyclables. And since I managed to make some cute stuffs out of candy and chips wrappers....I thought why not do the same with the brochures/maps. So here's my upcycled creation for today....I'm actually quite pleased with how it turned out. I mean...I love sewing and I love maps...and there's nothing more enjoyable and fulfiling than to combine these two of my loves. Now my cosmetics have a new home - and a darn cool one I'll say!


Tuesday, June 7, 2011

Goodbye my friend (for now).....

We are starting to pack up all of our stuffs. Yesterday, I finished sewing all of our jeans & pants that required alteration....as I think it's about time to pack up the sewing machine, my sewing supplies and fabrics. Today, I opened up the machine to clean and oil it before packing it away.
I also slipped in a small sachet of silica gel to take away any moisture that could possibly cause any rusting to the parts...especially in the humid summer climate.
It's time to say goodbye.....back into the box it went.....
....added another silica gel sachet just to be sure and sealed the box up with tape.
I realised the price tag is still stucked on the box.....so now you know that was what I paid for it (quite a steal huh?!). I've had it since 2009. One of my best investments to date....considering I managed to cover the full cost of it in the first couple hours of my very first yard sale :) It's a very basic easy-to-use machine....and it has served my needs really well.
See you again my friend.....in September! I know I'll be missing you.

Friday, May 20, 2011

Cellphone pouch.....a special order

Recently I got to know N through a friend on Facebook. N knows that I sew and had wanted me to custom make a pouch to fit her cellphone. She gave me her cellphone dimensions and picked out her fabric.

And this was what I had come up with based on what she had said she wanted. As it was the first time I was making a cellphone pouch....it took me numerous attempts before getting it right. Also, it didn't help that the brocade fabric was super difficult to handle as it frays like crazy and puckers easily too. Anyhow, I finally managed to make something decent looking and mailed it to N who lives on the west coast. I'm just glad N likes it.

The photos are courtesy of N as I had forgotten to do so in the rush to get the pouch out to N. Don't you just love her bling-bling phone?!

Monday, May 9, 2011

New pillow covers

Today, I decided to make some new covers for my landlord's existing pillows. Since it's a seaside house, I naturally went for the marine-theme when picking out the fabric. I got these beautiful fabric panels for a great price from a seller on etsy.
There are different prints on each panel. I added a zipper so that I/my landlord can remove the covers & toss them into the washer for cleaning whenever necessary.
The colors on the panels go quite nicely with my landlord's furniture. I hope he likes them when he returns this summer.

Friday, May 6, 2011

Arghhhhhh.......vinyl problems! (Recycled Reese's wrapper coupon pouch)

I was totally frustrated this morning while sewing another vinyl pouch. I had used the 20-gauge vinyl (vinyl on the front and back for each sheet of recycled wrapper). The sewing part was easy peasy....I usually sew it the way I'd using regular fabrics (sew on the wrong side of fabric and then flip out to the right side).

The cutting/sewing took me altogether 10min the most and I spent another HOUR(!!!) trying to flip it out......geez. In the process, I poked myself in one of my fingers till it bled and I also broke a nail. And despite all my efforts.....the corners still looked like these.......
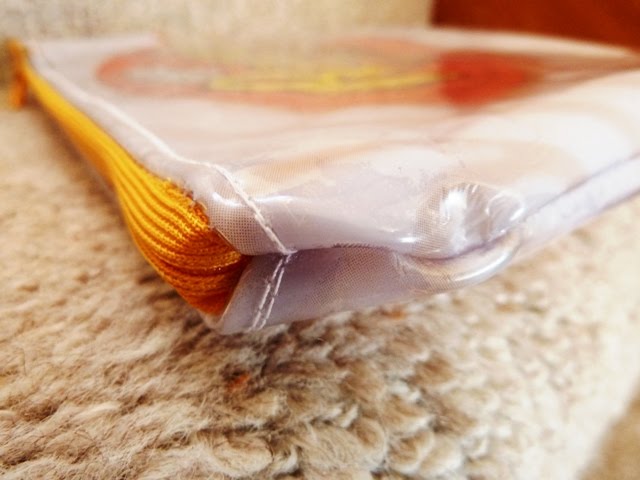
I tried various things like rounded the corners and made small V-cuts on the rounded corners, I also applied talcum powder on the vinyl so that it doesn't stick.....but still it's super duper hard to make the corners look nice. Anyone with tips for me please??? I'd be eternally grateful. My last resort would be to redesign the pouches or perhaps sew on the outside such that I don't have to do any flipping. But I really prefer a cleaner look with stitches on the inside. So HELP!!!!

Anyway, here's how it turned out. I like the see-through part!
And despite the ugly corners....the pouch still works in all the ways that I have wanted it to...so I can't really say I'm not happy with it :P

Sunday, May 1, 2011

Fritos zipper purse (recycled wrappers)

I couldn't wait to try out the teflon presser foot on an actual piece of sewn work.

My first project with the teflon foot was this Fritos zipper purse using recycled Fritos chips wrapper and 12-gauge vinyl.

I cut the chips bag into 2 halves and used the Fritos logo part (top) on one side of the purse and the picture part (bottom) on the other side of the purse.
My favorite Fritos flavor!!!!!

If you want to know the nutritional value of the fritos chips...please look inside the purse...haha :P

The exterior and interior of the purse have all been lined with vinyl. This could work well as a wet bag to hold diapers and wet swimsuits if it had been bigger. Will try to collect those super-size chip wrappers (just an excuse to eat more chips really!) to make into larger size wet bags.
This fritos purse is just the right size to hold my cellphone, tissue paper and wet wipes! And one more wrapper saved from the landfill.

Friday, April 29, 2011

No more sticky mess!!! (Teflon roller presser foot )

I was having a hell of a time trying to sew on vinyl with my regular presser foot. Then I learned to put paper over vinyl when sewing....but that too was a mess as little bits of paper kept getting stuck below the stitches.

So I bought the teflon roller foot...again from ebay.
It's amazing how this little thing can take away all my blood, sweat and tears when sewing on vinyl before. I tried the foot on my SUPER sticky clear vinyl and it was a breeze!!!
Stitches were nice and even. And not once did the vinyl get stuck on the presser foot.
LOVE IT!!! A must-have presser foot for all those who work with vinyl, leather and any sorts of "sticky" fabrics/materials.

How to attach ruffler foot on Brother sewing machine LS-2125

So I bought the ruffler foot (for low shank machines) to fit my Brother LS-2125 machine from a seller on ebay.

Took me awhile of fiddling around before finally figuring out how to attach the ruffler foot.

Here's a pictorial tutorial on how to attach the ruffler foot....so that you don't have to kill your braincells over it like I did :P

If you have the LS-2125 machine like I do, you should first remove your sewing needle and presser foot.
Next, unscrew the "foot catch".
Here's what it'd look like after you've unscrewed and removed the foot catch.
Now see this "U" part of the ruffler foot......
.....hook the U-part onto your needle clamp.....
....and for this part of the ruffler foot......
.....fit it over here.
So here's how your ruffler foot should fit on your LS-2125 machine.
Place the screw back and tighten it in place.
Attach your needle back, make sure it feeds nicely into the needle plate and then start ruffling away!!!
I tried ruffling on a thicker fabric like this one (fabric for men's coat).....it worked.
And then, I ruffled on this really thin tshirt fabric.....worked too!
I'm now officially....a ruffler! :P